Sunday, March 31, 2013

Sharon's Onion Bagels


We lived in Unalaska (Dutch Harbor) from 1988 through 1994. It was (and still is) a wild place. Wild weather, wild terrain, and some wild people. We made great friends during those years, many we still keep in regular contact with. One good friend, Sharon, happened to be in Homer for a week and we decided it would be fun to bake a batch of bagels together and relive some memories. Sharon is the one who showed me how to make bagels back when our kids were little. I always joke that it took a nice Catholic girl to teach this nice Jewish girl how to make bagels! 
We once made 200 bagels and sold them at the Unalaska Arts and Crafts Fair. We offered a "bagel plate lunch" for $5.00. It included a bagel sandwich (tuna salad or smoked salmon cream cheese), homemade potato salad and a pickle. Our booth was swamped and we sold out in under an hour.
Today, we'd work on a much smaller batch. Sharon and I had so much fun rolling, shaping, baking and reminiscing. The steam from the pot filled the room and the irresistible smell of baking dough wafted from the oven as we chatted and moved around the kitchen together.  I had made up some tuna salad earlier and as soon as the bagels were cool enough to handle, we piled it on and chowed down. The onions gave the dough a moist, earthy sweetness and the golden crust was just the right chewiness. Except for the soft "mmmmm"s coming from our stuffed mouths, it was the first time all morning that we were both quiet.


Onion Bagels
makes 24 big bagels

2 packages yeast (about 1 TBLS)
3 cups warm water
4 beaten eggs (plus one for egg wash)
1/2 cup sugar
10 to 12 cups flour
1/2 cup dehydrated onion (plus more for topping)
1 cup vegetable oil
1 TBLS salt
large pot of water plus 1TBLS sugar, 3 TBLS baking soda

Instructions: 
(don't be discouraged by the lengthy instructions, it's fun to do and goes quickly)                                               
  • Dissolve the yeast in 3 cups warm water in large bowl.
  • Mix in: 4 beaten eggs, 5-6 cups flour, 1/2 cup sugar, and 1/2 cup dehydrated onion.
  • Beat well, cover bowl with towel and let rise 1/2 hour.
  • Mix in: 1 cup vegetable oil, 1 Tablespoon salt, and about 5 more cups of flour. Dough should come together but still be slightly sticky, you will add a little more flour while kneading.
  • Knead on floured surface until smooth, adding flour a little at a time, about 5 or 10 minutes. You want a smooth, elastic dough that is not too sticky but not dry either.
  • Note: At this point you can continue on OR place covered bowl in the refrigerator overnight to proof, then shape and bake the bagels in the morning.
  • Place dough in oiled bowl, cover with towel and let rise in a warm place for about an hour or more. If you don't have a warm spot in your kitchen, you can set the bowl on top of another bowl that's half full of hot water. This creates a nice warm and humid environment for the dough to proof.
  • Once the dough has almost doubled in size, punch it down and knead briefly then return to bowl to rest for 20 minutes.
  • Meanwhile, get ready for the next steps: Fill a large pot halfway with water and stir in 1 TBLS sugar and 3 TBLS baking soda. Bring it to a boil while you shape the bagels.
  • Beat one egg in a small cup for the egg wash.
  • Reconstitute about 1/4 cup dehydrated onions in a small bowl of hot water, drain excess water. 
  • Oil or spray 2 large baking sheets.
  • Preheat oven to 425 degrees.
  • Roll dough into large log shape, cut into 4 equal pieces. Cut each piece into 6 equal pieces. Roll each piece into a log about 6 to 8 inches long, then bring the ends together and pinch to seal. Place on lightly floured board while you work on the rest.
  • When you've made 12, begin lowering them into the boiling water in batches of 4. Boil for just a minute, flipping over once. Remove with slotted spoon or spatula and place on oiled baking sheet. (6 to a sheet)
  • Brush each bagel with egg wash and top with some of the reconstituted onions.
  • Bake for about 15 minutes, rotating pans halfway through.
  • While they are in the oven, shape and boil the second half of the dough.
  • Cool on wire racks, then enjoy!
Note: If they last more than a day (doubtful!) they freeze beautifully and taste great toasted. I usually make a double batch just so I can give some away and freeze some.


Monday, March 18, 2013

"Spring Tonic" Spinach Pesto


Where I live it's not unusual to get a snowstorm (or two or three) in March. But the morning I woke up to swirling snow outside my window and nothing but shades of grey and white, I thought "I need something green!" I needed something vibrant, fresh, and saturated with the color of spring. What I really needed was a spring tonic. Luckily, my fridge was stocked with fresh spinach and some herbs, so pesto became the project for that blustery morning. It's so easy to make in either a food processor or blender, and I always make at least a double batch and freeze some for later. You can spoon it into an ice cube tray, freeze till solid, then pop out and store the cubes in a ziplock bag in the freezer. Perfect to brighten up a bowl of pasta, I also use it in place of red sauce on pizza and as a grill sauce for fish. Toss a couple cubes into a pot of minestrone or your favorite vegetable soup for an instant hit of color and extra flavor. The vibrant green color and fresh smell of herbs whirling around in my food processor certainly helped take my mind off of the blowing snow outside my door!


"Spring Tonic" Spinach Pesto

2 cups (packed) fresh spinach
1 cup (packed) fresh basil leaves
1/2 cup (packed) fresh flat-leaf parsley
1 peeled garlic clove
healthy pinch of sea salt
1/2 cup Extra Virgin Olive Oil
1 Tablespoon fresh lemon juice
2 Tablespoons sliced almonds (or pine nuts or walnuts)
2 Tablespoons grated Parmesan cheese

Put everything (just 1/4 cup olive oil for now) into food processor and pulse until it all starts to break down. Scrape down sides if needed then run machine while drizzling in remaining 1/4 cup olive oil. Process until it's the consistency you like. If you want it a little thinner, drizzle in a little more oil.

Happy Spring!

Saturday, March 9, 2013

Aaron's (upstairs) Birthday Dinner


Aaron's 29th birthday gave us the perfect reason for a delicious family dinner. Beef Bourguignon (well, my simple version of Julia Child's slow-braised beef in red wine), Sour Cream Mashed Potatoes, Garlic Roasted Broccolini, and the star of the show...Chocolate Silk Pie. This was Aaron's request for his birthday "cake" and since I'd never made Chocolate Silk Pie before, I dove into cyberspace and began the search for a good recipe. Most of the recipes I found used raw eggs in a mousse-like filling, one recipe even included marshmallow cream. Since none of those appealed to me I kept searching and came up with this recipe from Cooks.com which is baked, then cooled and topped with whipped cream. It was easy, festive, and sinfully delicious. Next time I will cut back a little on the sugar (from 1 cup to 3/4 cup) I know that baking is a science so I'm not sure how this will affect the pie...if anyone tries the lower sugar version, please let me know how it works out. The posted recipe calls for a standard pastry crust but I made a chocolate graham cracker crust instead. Enjoy!

CHOCOLATE SILK PIE
from Cooks.com (submitted by:Judy Dennert)

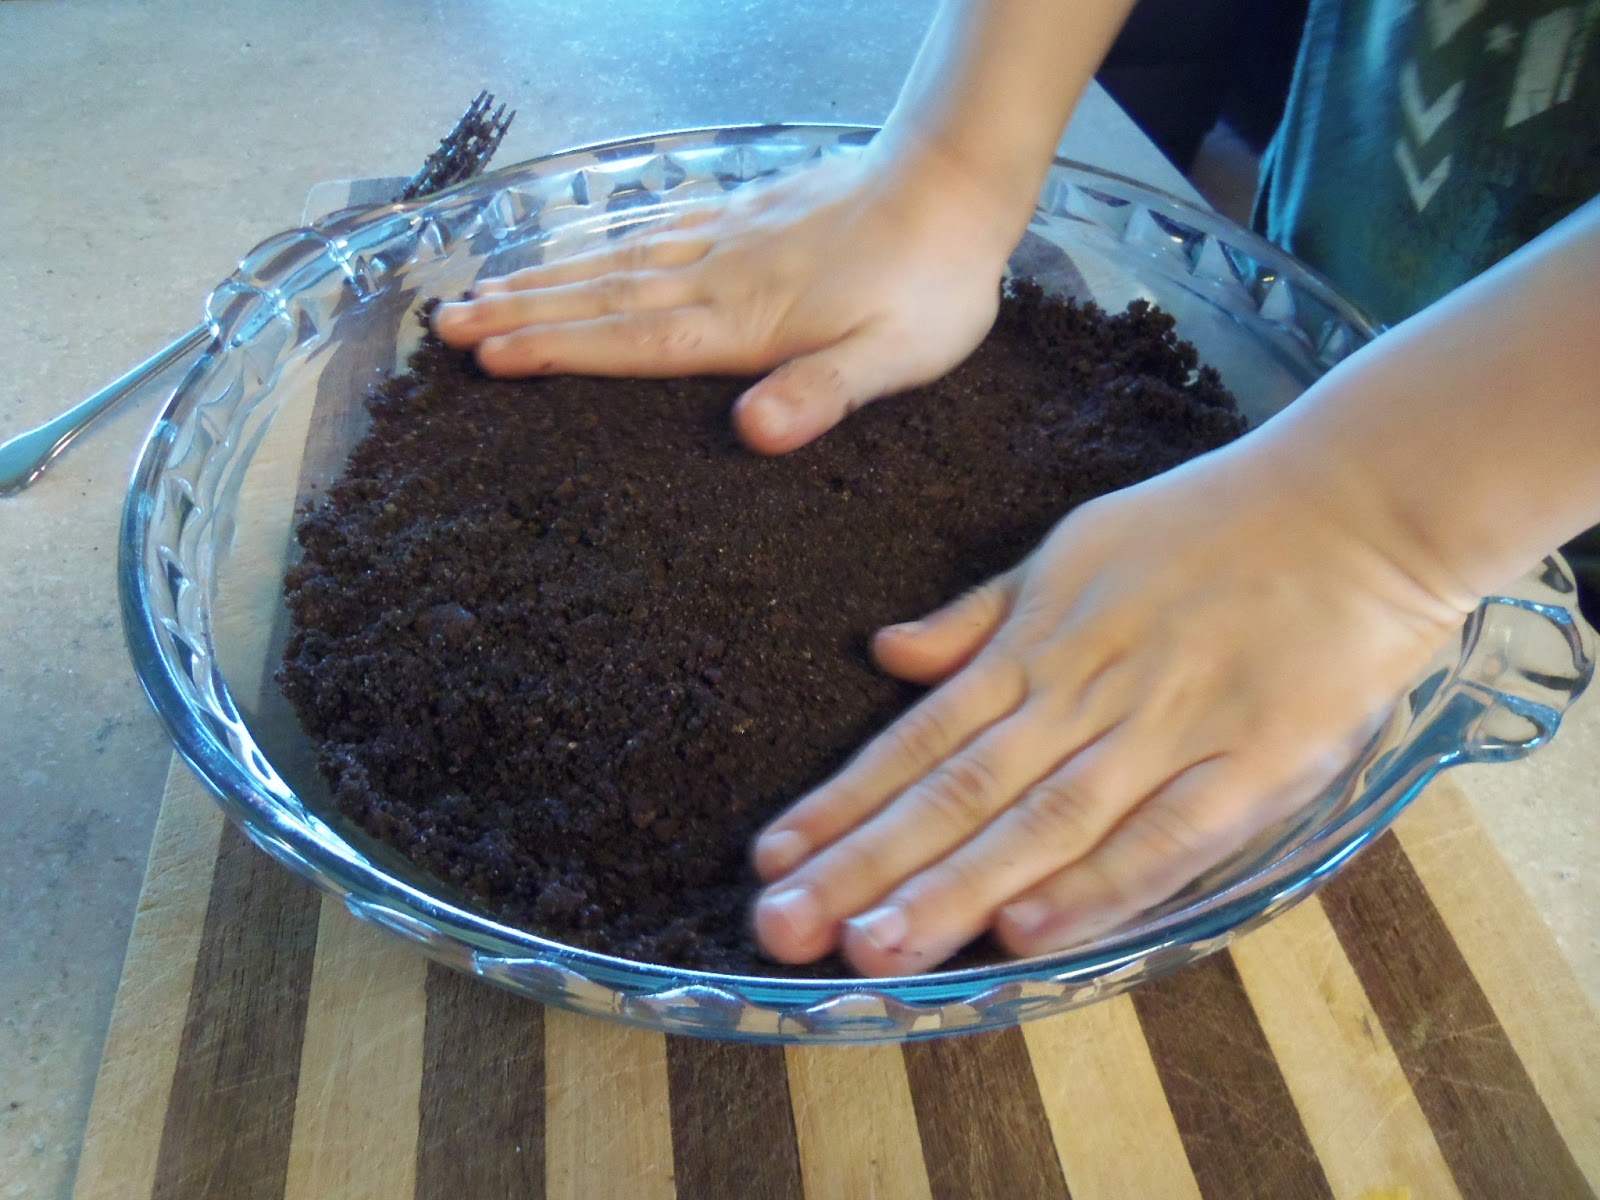
1 unbaked single pie crust (or my chocolate graham cracker crust: 8 chocolate graham crackers-crushed, 1/4 cup sugar, 1/3 cup melted butter. Mix all together and press into pie plate...easy!)
1 cup semisweet chocolate chips
1/2 cup (1 stick) butter
1 cup sugar
pinch of salt
1 tbsp unsweetened cocoa powder
3 eggs
2/3 cup evaporated milk
1 tsp vanilla

Preheat oven to 350 degrees.

In large, microwave-safe bowl, melt chocolate chips and butter at 50% power for 2 minutes until butter is melted; stir until smooth. Whisk in salt, sugar, cocoa powder, eggs, evaporated milk, and vanilla extract, whisk until well blended. Pour chocolate mixture into crust.

Bake 30 minutes or until filling has puffed, but center still wiggles. Cool completely, refrigerate until ready to serve.

Garnish with whipped cream and chocolate shavings or mini chocolate chips


Note: I found it took about 38 minutes for the filling to puff. It's not very pretty unadorned so I topped the whole pie with lightly sweetened whipped cream and drizzled with chocolate syrup.

Wednesday, February 27, 2013

HALIBUT CATAPLANA

This recipe was inspired by the seafood stew commonly made in the Algarve Region of Portugal. Mixed varieties of fresh seafood, potatoes and onions cook in a copper Cataplan dish and produce a delicious broth, perfect for dipping into with fresh, crusty bread. Since I live in Alaska, I've substituted Halibut but any firm white fish would be just as good.

Serves 4 healthy appetites

Halibut Cataplana
1 1/2lbs Halibut fillet
Star Extra Virgin Olive Oil
2 TBS butter
1 large onion, chopped
4 garlic cloves, peeled and sliced
3 cups vegetable stock or chicken broth
4 large potatoes, peeled, quartered and cut into 1 1/2" pieces
4 carrots, peeled and cut into 1" pieces
1/2 cup cooking sherry
1/2 cup chopped cilantro
1/2 cup Star Green Olives (pimento stuffed or with herbs, your choice...I used Star Green Olives with Basil)

In a large, deep, covered sauté pan or Dutch oven heat 3 TBS Star Extra Virgin Olive Oil. Sauté onion until translucent and just beginning to brown. Add garlic, vegetable stock or broth, potatoes and carrots. Season with salt and pepper. Turn down heat, cover and cook until vegetables are just tender (about 20 min). While the vegetables are cooking, remove skin from Halibut fillet and cut meat into 1 1/2" cubes. Pat dry and season well with salt and pepper. Heat 2 TBS Star Extra Virgin Olive Oil and 2 TBS butter in medium skillet until very hot but not smoking. Add about 1/2 of the halibut cubes and let them brown undisturbed for about 3 or 4 minutes. Do not crowd the pan or stir the fish, you want a nice golden brown sear to develop. Turn pieces over and let cook about one minute then add to the vegetables immediately, nestling the fish into the broth. Turn off heat under vegetables and replace the lid, the residual heat will finish cooking the fish. Do the same thing with the second half of the fish cubes. Deglaze the skillet with the cooking sherry, scrapping up any browned bits and pour over the vegetables. Sprinkle on the cilantro and Star Green Olives, replace the lid and let sit for 10 minutes. Just before serving, drizzle with a little more Star Extra Virgin Olive Oil and stir very gently to distribute cilantro and olives.
Serve with good crusty bread and a big green salad.